Contents:
- Why Sectioning Matters: The Foundation of Perfect Highlights
- How to Section Hair for Highlights: The Systematic Approach
- Step 1: Start with Clean, Dry Hair
- Step 2: Create the Center Parting
- Step 3: Create Horizontal Sections
- Step 4: Subdivide Into Working Sections
- Step 5: Secure with Clips
- Step 6: Mark Your Highlights Pattern
- Tools You’ll Need for Sectioning
- Highlighting vs. Lowlighting: How Sectioning Differs
- Seasonal Timing and Maintenance Sections
- Common Sectioning Mistakes to Avoid
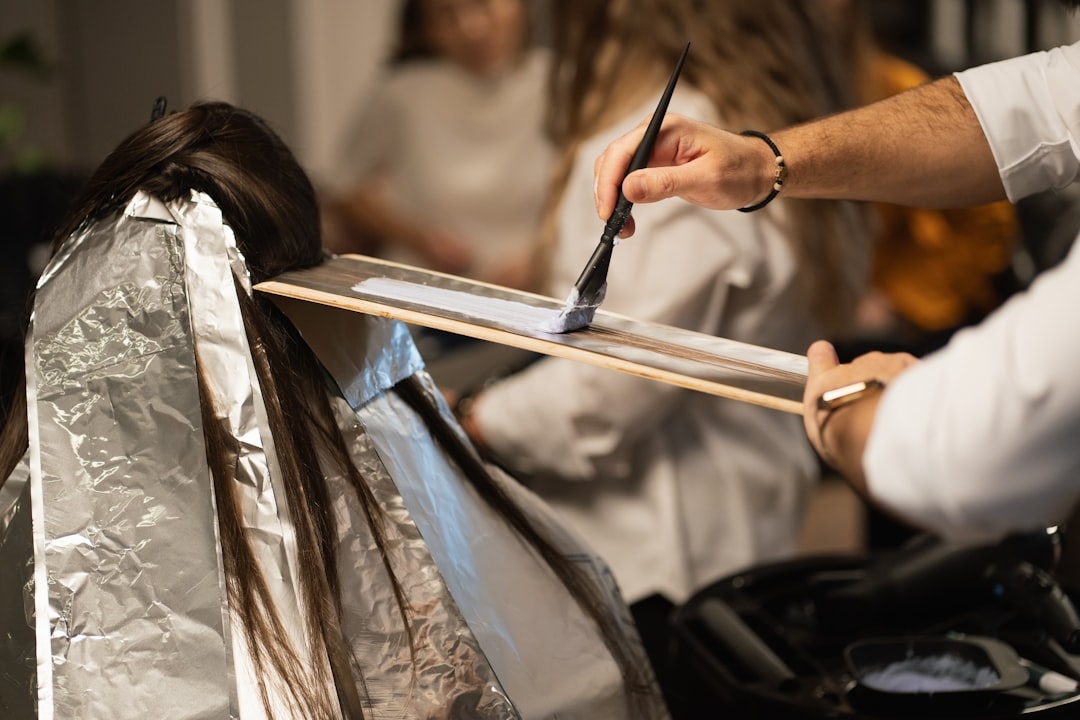
- Application Tips Once Sections Are Complete
- Budget-Conscious Highlighting Strategy
- FAQ: Hair Sectioning for Highlights
- How many sections do you need to section hair for highlights?
- Can you highlight without sectioning?
- Do you section hair before or after shampooing for highlights?
- What’s the difference between sectioning for highlights and sectioning for cut?
- How do you section thick, curly hair for highlights?
- Mastering Sectioning for Flawless Highlights
Proper sectioning is the difference between salon-quality highlights and patchy, uneven colour that screams “homemade.” Most people skip this step, throwing random lightener at their hair and hoping for the best. How to section hair for highlights correctly is actually the most critical factor determining success—more important than product quality, timing, or technique.
Why Sectioning Matters: The Foundation of Perfect Highlights
Sectioning serves two purposes: it ensures lightener reaches every section of hair evenly, and it prevents accidental overlapping that causes damage and uneven colour. Proper sectioning divides your hair into manageable pieces small enough to treat systematically. Without sectioning, you’ll inevitably miss sections (leaving them dark) or treat others multiple times (causing breakage and brassy tones).
Professional stylists spend 10-15 minutes on sectioning before applying a single drop of lightener. Home practitioners typically spend 30 seconds and wonder why results disappoint. The time investment yields dramatically better results. Plan for 15-20 minutes of sectioning before any product application.
How to Section Hair for Highlights: The Systematic Approach
Step 1: Start with Clean, Dry Hair
Wash your hair the evening before or morning of highlighting (not immediately before; wait 2-4 hours). Dry hair completely before sectioning. Wet hair is unpredictable—strands stick together and don’t stay where you pin them, making systematic sectioning impossible. Completely dry hair allows you to position pieces precisely.
Step 2: Create the Center Parting
Create a straight parting from your forehead to the nape of your neck, directly down the centre. This is your primary reference line. Use a rattail comb (approximately £2-£4, reusable indefinitely) to create a clean, visible parting. This divides your hair into left and right halves, creating your first major sections.
Step 3: Create Horizontal Sections
Starting at your hairline, create horizontal partings approximately 2-3cm apart from the front of your head to the back. A useful technique: measure from your hairline to about 2-3cm back, create a parting across from ear to ear, clip this top section, then repeat. Continue downward until you’ve sectioned from forehead to nape.
Number of horizontal sections needed: for shoulder-length hair, typically 4-5 sections per side (8-10 total). For longer hair (past shoulder), you’ll need 6-7 sections per side (12-14 total). Each section represents an independent treatment unit.
Step 4: Subdivide Into Working Sections
Take your top-left horizontal section and further divide it into 2-3 vertical subsections (from hairline to crown). Each subsection should be approximately 2-3cm wide. This creates small, workable pieces you can treat consistently.
Repeat this subdivision for each horizontal section down the left side, then repeat the entire process on the right side. You’ll end up with 20-40 small subsections depending on hair length and density.
Step 5: Secure with Clips
Use hair clips (approximately £1-£3 for a set of 6-8, reusable indefinitely) to secure sections you’re not currently working on. Clip only the hair you’ve divided off; leave the section you’re about to highlight loose. This prevents sections from mixing and ensures you treat systematically.
Step 6: Mark Your Highlights Pattern
Decide which subsections will receive lightener. Common patterns include:
- Face-framing: Highlight narrow sections around your face (approximately 2-3cm on each side), plus scattered sections throughout
- Money piece: Highlight only the two front sections, framing the face
- Balayage-style: Highlight random sections throughout for natural-looking variation
- Full highlights: Highlight every other subsection for dimensional coverage
Mark your chosen sections with a piece of tape on your clips, or simply remember them mentally. Most people start by applying lightener to every other subsection front-to-back, creating natural dimension.
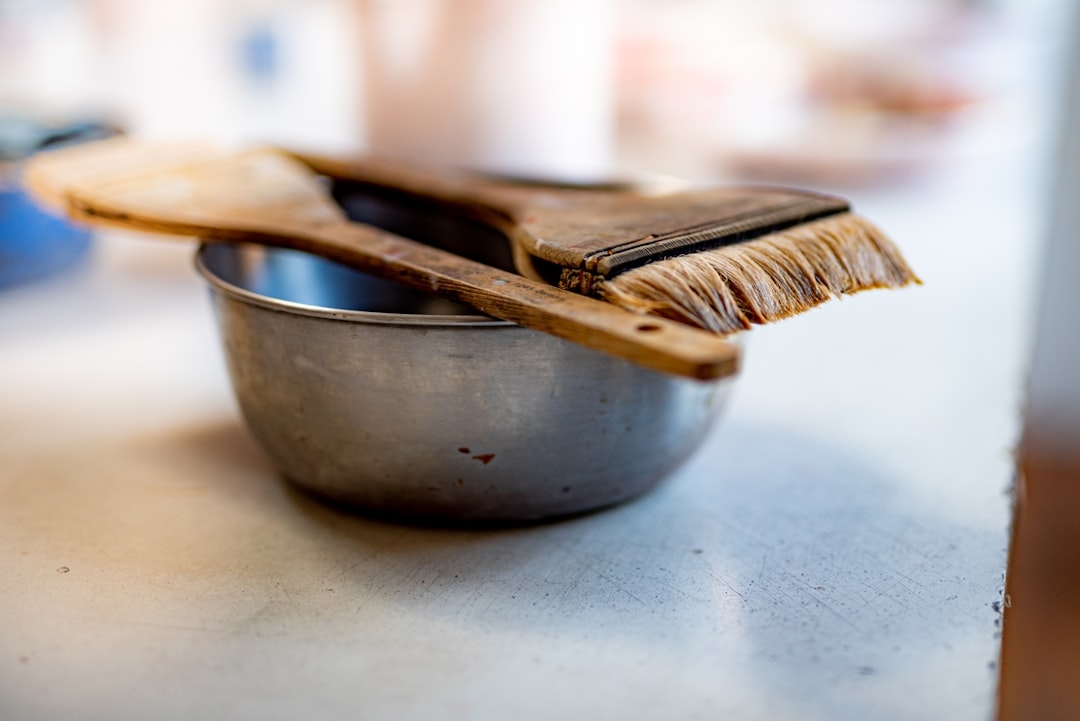
Tools You’ll Need for Sectioning
- Rattail comb: Approximately £2-£4. Essential for creating clean, visible partings
- Hair clips: Approximately £1-£3 for a set of 6-8. Secure sections neatly
- Mirror: Essential for seeing the back of your head. A handheld mirror (£3-£8) plus your bathroom mirror works well
- Tape or markers: Optional but helpful for marking which sections get highlights. Use small pieces of tape or pen marks on your clip edges
- Sectioning spray: Optional. A light hairspray (£2-£4) helps keep sections defined as you work, though it’s not essential
Total cost for sectioning tools: approximately £8-£20 one-time investment, reusable for years.
Highlighting vs. Lowlighting: How Sectioning Differs
Highlighting: Lightening sections of hair. Requires sectioning every area you want lighter. Sections can be close together (frequent highlights = high-contrast, dimensional look) or far apart (occasional highlights = subtle, natural look).
Lowlighting: Darkening sections. Uses identical sectioning technique. The only difference is product type (darkening formula instead of lightening). Some people combine both, using different sections for highlights and lowlights simultaneously.
Sectioning methodology is identical regardless of whether you’re highlighting or lowlighting. The principle remains: divide your hair systematically so you can apply product evenly.
Seasonal Timing and Maintenance Sections
Spring (April-May 2026) and summer (June-August) peak seasons for highlighting as people prepare for holidays and outdoor season. If you’re planning home highlights, start in early April before peak salon demand (when prices rise £10-£20 during busy season). Second timing consideration: plan your maintenance schedule. Highlights typically need refreshing every 6-8 weeks (growing roots become visible). Schedule your next session before roots exceed 5cm.
For maintenance highlights, you section only the regrowth area (new growth since your last highlight). This is simpler than initial sectioning—focus only on the 2-3cm of hair at roots where new dark hair is visible. This reduces product usage and treatment time dramatically.
Common Sectioning Mistakes to Avoid
Mistake 1: Sections too large. Thick, large sections don’t receive even product coverage. Lightener on the surface reaches maximum strength quickly; lightener near the scalp or toward the roots of thick sections takes longer. Create smaller sections (2-3cm subsections) to ensure even processing.
Mistake 2: Inconsistent section sizes. Large sections process faster than small sections. If you alternate between thick and thin sections, thick ones end up over-processed while thin ones are under-processed. Maintain consistent sizing throughout your head.
Mistake 3: Not securing unsectioned hair.** Loose, unsectioned hair mixes with your working section, causing inconsistent application. Clip everything you’re not currently treating. Don’t rely on your hands to hold sections—you need both hands free for product application.
Mistake 4: Forgetting the back of your head.** The back is hardest to see and easiest to miss. Use a handheld mirror to check your back sections before treatment. Many people highlight their front and sides thoroughly while the back remains completely untreated.
Application Tips Once Sections Are Complete
Once sectioning is finished, work systematically from one side to the other. Apply lightener to your first subsection, unclip your second subsection, apply lightener, repeat. Work from the smallest, most delicate sections (around your face) first, saving the thickest sections (crown, underside) for last. This ensures you’re not over-processing delicate hair near your face.
Apply lightener in thin layers from mid-shaft toward ends first, then apply to roots last. Roots process faster (body heat accelerates the chemical reaction near the scalp), so applying later ensures even processing across the entire section.
Budget-Conscious Highlighting Strategy
Professional highlights cost £60-£150 per session. At-home highlighting kits cost £8-£20. The difference isn’t product quality—it’s technique and precision. By mastering sectioning, you can achieve professional results at home for a fraction of the cost.
Budget breakdown for home highlighting:
- Highlighting kit: £10-£20 (covers one full-head application)
- Sectioning tools (one-time): £8-£15
- Maintenance products (deep conditioner, heat protectant): £15-£25 (lasts 2-3 months)
- Total cost for 8 weeks: approximately £25-£40 versus £60-£150 professionally
The investment in learning proper sectioning saves hundreds yearly while producing results nearly identical to professional applications.
FAQ: Hair Sectioning for Highlights
How many sections do you need to section hair for highlights?
Minimum 8-10 horizontal sections for short hair, 12-14 for medium, 16-20+ for long hair. Subdivide each horizontal section into 2-3 vertical subsections, creating 20-40 total working pieces. More sections create more precision; fewer sections speed up the process. Balance between speed and accuracy based on your experience level.
Can you highlight without sectioning?
Technically yes, but results will be poor. You’ll miss sections, over-process others, and end up with uneven colour. Sectioning takes 15-20 minutes; poor results require expensive correction treatments. The time investment is absolutely worth it.
Do you section hair before or after shampooing for highlights?
Section completely dry hair. Damp or wet hair is impossible to section properly—strands stick together and won’t stay clipped in place. Wash the evening before or morning of highlighting, dry completely, then section 1-2 hours before application.
What’s the difference between sectioning for highlights and sectioning for cut?
Cutting requires sections aligned with the hair’s natural fall and growth patterns. Highlighting requires geometric sections (straight partings) for systematic product application. The methodologies are different; use whichever approach matches your current goal.
How do you section thick, curly hair for highlights?
Thicker hair requires smaller subsections (perhaps 1.5-2cm instead of 2-3cm) to ensure even product penetration. Curly hair benefits from slightly larger sections (opposing the above) because curls create natural texture variation. For thick, curly hair, aim for slightly larger horizontal sections but more numerous vertical subsections. Test with one section to confirm product penetration reaches throughout before treating your entire head.
Mastering Sectioning for Flawless Highlights
Sectioning is boring, tedious work that professionals rush through silently while you wait in their chair. Yet it’s the foundation of beautiful highlights. Invest the time, use the simple tools described, follow the systematic approach, and you’ll achieve results matching or exceeding salon quality. The only difference between DIY success and failure is consistent, careful sectioning—nothing else matters as much.