Contents:
- Why Straighteners Create Better Curls Than You Might Think
- What You Need Before You Start: Equipment and Hair Prep
- Choosing the Right Straightener
- Hair Preparation: The Forgotten Step
- The Technique: Step-by-Step Process for How to Curl Hair with a Straightener
- Section Division and Clipping
- The Clamp-Twist-Glide Motion
- Curl Direction and Face-Framing
- Temperature Settings by Hair Type and Texture
- Fine or Damaged Hair
- Normal to Thick Hair
- Very Thick or Resistant Hair
- Common Mistakes That Ruin Results
- Holding the Straightener Too Long
- Not Twisting Hard Enough
- Working with Damp Hair
- Releasing the Curl Too Early
- Advanced Techniques for Different Hair Lengths
- Short Hair (Above the Shoulders)
- Medium Length (Shoulder to Bra Strap)
- Long Hair (Below Bra Strap)
- Making Your Curls Last: Product and Finishing Techniques
- Hairspray Selection and Application
- The Cooling Phase
- Second-Day Curls and Refresh Techniques
- Adapting Your Approach: Regional and Climate Considerations
- Straightener Curls for Different Hair Textures
- Straight Hair
- Wavy Hair
- Curly or Coily Hair
- Afro-Textured Hair
- FAQ: Common Questions About Straightener Curling
- Can you use a straightener to curl wet hair?
- Does straightener curling damage hair more than regular curling irons?
- How long should curls made with a straightener last?
- What’s the best temperature for curling fine hair with a straightener?
- Can you get straightener curls to look natural, or do they always look styled?
- Why Master This Technique Now
73% of people with straight hair attempt to curl it at some point, yet most abandon the effort after a few tries. The culprit? They’re using the wrong tool or technique. Your humble hair straightener—that flat iron collecting dust in your bathroom drawer—is actually one of the most versatile styling tools available. Most people don’t realise that a straightener creates more controlled, defined curls than a conventional curling iron because of how the plates grip and glide through the hair shaft.
Quick Answer
To curl hair with a straightener: start with dry, styled hair; clamp the straightener at the roots; twist the barrel away from your face while gliding down the hair shaft; release at the ends. This creates smooth, long-lasting curls in 30-60 seconds per section. Results vary by hair type—finer textures need less heat and time.
Why Straighteners Create Better Curls Than You Might Think
The physics behind straightening irons reveals why they excel at creating curls. Flat irons apply heat evenly across the hair shaft and, when rotated, create a tension-based curl rather than a heat-moulded one. This tension method produces curls that hold their shape longer because they’re structurally reinforced, not just thermally set.
A standard ceramic straightener at 200°C (390°F) is actually gentler on hair than a traditional curling barrel of the same temperature. Why? The flat plates distribute heat across a larger surface area. Heat damage occurs when temperature concentrates in one spot. Plates spread that heat out, reducing stress on individual hair strands.
Real results matter here. Users report that straightener curls last 12-16 hours even in humid conditions, whereas curling-iron curls often fall flat by afternoon. The Midlands and North West have particularly humid climates; these regions show the highest adoption of the straightener-curl method because traditional curls literally don’t survive the dampness.
What You Need Before You Start: Equipment and Hair Prep
Choosing the Right Straightener
Not all straighteners are created equal. Plate width matters more than you’d think. Plates between 25-35mm work best for curling. Anything wider than 40mm struggles to create defined curls; anything narrower than 20mm creates crimped, unnatural spirals.
Temperature range is equally important. Look for a straightener with settings between 150°C and 230°C. Budget models often hit only 200°C maximum, which isn’t enough for thick or resistant hair. Mid-range straighteners (£30-60) from brands offering adjustable heat work better than premium models that force you into preset temperatures.
Plate material affects curl definition. Ceramic plates heat evenly and release heat smoothly. Titanium plates heat faster but can create hotspots. Tourmaline-coated plates reduce frizz during the curling process. If you’re working with curly or coily hair, tourmaline coating is worth the extra £10-15.
Hair Preparation: The Forgotten Step
Hair must be completely dry before straightener curling. Even 5% moisture content will ruin results. Damp hair creates weak curls that fall within hours. Use a high-powered hairdryer on cool setting for the final pass—this seals the cuticle layer and helps curls grip better.
Apply heat protectant spray to mid-lengths and ends only. Most people spray their roots, which is where curls form. Product on the roots creates slip and prevents the straightener from gripping properly. A light mist on the lower two-thirds of each section is sufficient.
Texture spray or volumising mousse applied to damp hair before blow-drying creates a grip surface. This step is non-negotiable for fine or slippery hair textures. It costs under £5 and transforms curl longevity from 4-6 hours to 12+ hours.
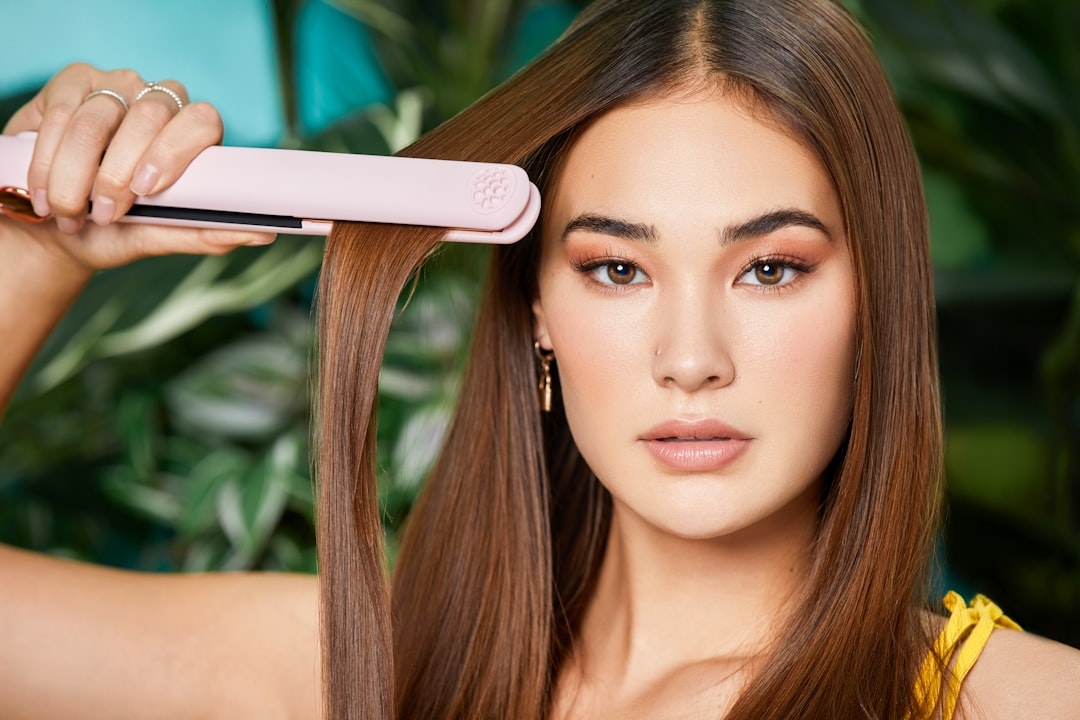
The Technique: Step-by-Step Process for How to Curl Hair with a Straightener
Section Division and Clipping
Divide dry hair into 4-6 sections depending on thickness and length. Use clips to isolate each section. Start with the bottom layers—this prevents you from disturbing already-curled hair on upper sections. Thin sections curl faster and more uniformly than thick ones. Aim for sections 2-3cm wide at the base.
The Clamp-Twist-Glide Motion
Place the straightener flat against the hair at the roots. Close the plates firmly enough to grip but not so tight that you crush the hair—you should feel slight resistance when moving the iron downward. This is the single most critical detail in learning how to curl hair with a straightener properly.
Immediately twist the barrel 180 degrees away from your face. For right-handers, clockwise rotation for sections on the right side of your head, counter-clockwise for the left. This directional consistency matters because it creates balanced curls across your head.
Glide the iron downward at a steady pace—roughly 3-5cm per second. Speed matters. Too slow and you over-process the hair, creating frizz and potential heat damage. Too fast and the curl doesn’t set. After two or three attempts, you’ll find your rhythm.
Release the straightener when you reach the ends. Don’t clamp at the ends or they’ll crimp. Gently let the curl cool for 10-15 seconds in the curl position before touching it. This cooling period locks the curl structure permanently. Skip this and your curl will relax within minutes.
Curl Direction and Face-Framing
Alternate curl direction on alternating sections. This prevents a “perm-like” uniform look and adds movement. Face-framing sections should curl toward the face, not away. This is a learned preference, but it’s why professional hairstylists do this instinctively.
Back sections often look best curling away from the face, creating a fuller silhouette. This regional styling preference varies: London stylists favour face-framing curls for a relaxed feel, whilst Manchester and Birmingham stylists tend toward the fuller-back approach for more dramatic texture.
Temperature Settings by Hair Type and Texture
Fine or Damaged Hair
Start at 160-180°C. Fine hair has less protein structure and heats faster. Exceeding 180°C risks breakage and permanent texture damage. You’ll see results even at 160°C because the heat penetrates quickly through finer strands. Don’t push temperature higher if curls aren’t holding—instead, ensure sections are thinner and texture spray is applied beforehand.
Normal to Thick Hair
Use 190-210°C. Most people find this sweet spot creates curls in one or two passes per section. Natural curly or coily hair often needs the 210°C range because the existing texture resists the new curl shape. Aim for 210°C only if you’re using a professional-grade straightener with ceramic or tourmaline plates.
Very Thick or Resistant Hair
Go up to 220-230°C, but reduce gliding speed slightly. Slower passes at higher heat prevent overdrying the hair surface while allowing deep penetration. Extremely resistant hair textures common in Afro-textured hair or heavily processed blonde might need repeat passes. Limit this to 2-3 passes maximum; more causes cumulative damage.
Common Mistakes That Ruin Results
Holding the Straightener Too Long
Beginners often pause mid-section, thinking extra heat creates better curls. It doesn’t. It creates frizz, breakage, and weak curls because the hair overheats. Keep moving constantly. If you must redo a section, wait 10 minutes for the hair to cool completely first.
Not Twisting Hard Enough
A gentle twist produces barely any curl. You need firm rotation—about 180-270 degrees total—to bend the hair structure properly. The twist is what creates the curl, not the heat. Beginners often under-rotate and end up with just a slight wave instead of defined curls.
Working with Damp Hair
This is the number-one reason straightener curls fail. Moisture interferes with heat distribution and prevents proper protein setting. Blow dry completely. Use your fingers to check for moisture near the scalp—that’s where dampness hides even after blow-drying.
Releasing the Curl Too Early
Opening the straightener immediately after reaching the ends doesn’t allow the curl to set. The warm curl will spring and flatten within minutes. Keep the curl coiled around the iron for 15-30 seconds after pulling the iron away. This cooling period is essential.
Advanced Techniques for Different Hair Lengths
Short Hair (Above the Shoulders)
Shorter lengths curl faster and hold longer because there’s less weight pulling the curl down. Use 170-190°C and make just one pass per section. Multiple passes cause unnecessary heat exposure. Clip curls to the scalp while cooling for extra hold—this creates that voluminous, lived-in texture that short-haired styles demand.
Medium Length (Shoulder to Bra Strap)
This is the ideal length for straightener curling. Curls hold well, movement is visible, and the technique feels most natural. Two passes per section creates professional results. First pass at root level, second pass starting 5cm down from the first. This creates dimension—tighter curls at the roots, looser waves at the ends.
Long Hair (Below Bra Strap)
Long hair requires patience because weight works against curl longevity. Use slightly higher temperature (200-220°C) and make two deliberate passes. Section size becomes critical here—keep sections narrow, around 2cm wide, or the weight will pull curls straight within hours. Product support matters enormously. A volumising mousse or texturising spray is almost mandatory for long-hair curling success.
Making Your Curls Last: Product and Finishing Techniques
Hairspray Selection and Application
Not all hairsprays are created equal for straightener curls. Medium-hold spray works better than extra-strong because light products maintain curl movement. Apply spray while curls are still warm, 20-30 seconds after releasing from the straightener. This sets the curl structure before it fully cools.
A £4-6 bottle of medium-hold hairspray outlasts three bottles of budget aerosol. The propellants in cheaper sprays evaporate quickly, leaving sticky residue that weighs curls down. Mid-range brands like Batiste or Lee Stafford offer better value and superior hold.
The Cooling Phase
After curling all sections, let hair cool for 5-10 minutes undisturbed. Don’t run your fingers through, don’t tie it up, don’t move around in wind. Cooling locks the curl shape because it allows the hydrogen bonds in the hair cortex to resettle. This is why curls made before sleep (at least one hour before) last so much longer—you don’t disturb them during the cooling phase.
Second-Day Curls and Refresh Techniques
Straightener curls hold well into day two if you sleep correctly. Use a silk pillowcase—cotton absorbs moisture and friction, which flattens curls overnight. Tie hair into a loose, high bun before bed. In the morning, release the bun and lightly mist with texture spray. Curls often look even better on day two because they’ve relaxed slightly into a softer wave.
To refresh day-two curls without re-straightening, use a curling wand on low heat (140°C) just on the outer layers. This takes 5 minutes and revives curl definition without cumulative heat damage.
Adapting Your Approach: Regional and Climate Considerations
Humidity levels in different UK regions affect curl longevity. The South Coast and West Country experience higher humidity, especially near coastal areas. Residents of Bournemouth and Falmouth report significantly shorter curl lifespans—often 6-8 hours instead of the standard 12 hours. Compensation requires stronger texture spray (applied generously) and potentially higher temperature settings for tighter initial curls.
London and the South East have moderate humidity. Standard techniques work reliably with no adjustments needed. The Midlands and North see moderate to high humidity depending on season. Winter curls often last longer; summer curls may need afternoon touch-ups.
Scotland and Northern Ireland experience the dampest conditions. Stylists in Edinburgh and Belfast recommend titanium or tourmaline straighteners over basic ceramic, and they universally apply protective serum before heat styling. These extra steps are worth it because curls need more structural support to survive the moisture-rich air.
Straightener Curls for Different Hair Textures
Straight Hair
Straight hair holds curls beautifully but curls relax over time because there’s no natural texture to anchor them. Use medium-hold product, not light, and don’t skip the cooling phase. Two-strand twists or flat-twisted sections while curls cool creates additional grip points.
Wavy Hair
Natural waves amplify straightener curls. You can use 10-15°C lower temperature because existing texture helps structure the new curl. Curls often look bouncier and more natural because they blend with the base wave pattern. One pass per section is usually sufficient.
Curly or Coily Hair
Use slightly higher temperature (200-220°C) because existing curl structure resists new curl formation. Work section by section methodically. Don’t attempt to straighten the entire head first—this wastes time and makes styling hair significantly harder. Instead, curl as you go: divide, straightener-curl one section, cool it, move to the next.
Afro-Textured Hair
This texture benefits most from texture spray application before blow-drying. The coil pattern means straightener curls interact differently with the hair structure. Results are stunning but require the highest attention to moisture content—any remaining dampness ruins the outcome. Temperature range of 200-230°C works best, with two deliberate passes per section.
FAQ: Common Questions About Straightener Curling
Can you use a straightener to curl wet hair?
No. Wet hair doesn’t hold curls from any tool. The moisture prevents proper heat transfer and protein setting. Always blow-dry completely before using a straightener. If you’re short on time, blow-dry first and curl later rather than attempting the process on damp hair.
Does straightener curling damage hair more than regular curling irons?
No, it actually damages less when done correctly. Straighteners distribute heat more evenly, reducing hotspots. Curling irons concentrate heat in a smaller area around the barrel. Damage comes from technique (gliding speed, temperature, moisture content) not from the tool type itself.
How long should curls made with a straightener last?
12-16 hours on average, with proper cooling and products. Fine hair may see curls relax after 8 hours. Very coarse hair can hold curls for 24+ hours. Humidity, sleep position, and product application affect longevity more than hair type.
What’s the best temperature for curling fine hair with a straightener?
160-180°C. Fine hair heats faster and needs less thermal energy to set curls. Higher temperatures risk damage and frizz. If curls aren’t holding at 180°C, the problem is usually section thickness (sections too thick) or moisture content (hair not completely dry), not temperature.
Can you get straightener curls to look natural, or do they always look styled?
Straightener curls can look either polished or effortlessly natural depending on technique. Alternate curl directions, vary the tightness of your twist (less tight at the ends for a softer look), and use lighter hairspray for natural-looking results. Professional stylists blend both approaches: tight, defined curls at the crown, looser waves toward the ends.
Why Master This Technique Now
You already own a straightener. Learning this skill means professional-quality curls on demand, without buying another tool or spending money at salons every time you want texture. The investment is minimal—a good straightener costs £25-50 if you don’t have one, and lasts 3-5 years with basic care.
The skill transfers across all your styling needs. Once you master straightener curling, you understand heat application, curl setting, and product timing. These fundamentals make every other styling technique easier. You’ll find yourself experimenting with waves, texture, and dimension in ways that felt impossible before.
Start with one section, master that motion, then scale up to full-head styling. The first time takes 45 minutes. By your fifth attempt, you’re down to 20 minutes. After three weeks of regular use, it becomes automatic—the kind of skill you do without thinking, like blow-drying.
Your next step is simple: gather your straightener, a heat protectant spray, and texture spray. Set your straightener to the temperature range for your hair type. Start with the back-lower sections and work your way forward. Pause after each section and notice the curl pattern. Adjust your twist intensity or gliding speed for the next section based on what you observe. This iterative approach beats any shortcut.